Patching ESXi 8.0U1 to 8.0U3i via esxcli
- Mark
- 20 hours ago
- 2 min read
So today I wanted to update my old Dell T7910 Lab machine to 8.0U3i. It was running a pretty old build (ESXi 8.0U1) from 2023 so I checked the interoperability matrix for ESXi first to make sure the upgrade path was supported and great news, it is, so lets proceed.
Download the patch file
In the Broadcom Portal, navigate to https://support.broadcom.com/group/ecx/downloads, select VMware vSphere > Solutions > VMware vSphere Enterprise Plus > 8.0 > VMware-ESXi-8.0U3i-25205845
You will see the file VMware-ESXi-8.0U3i-25205845-depot.zip (978.5MB) Click the download icon to obtain the file.

Upload the patch to the ESXi host
Obviously there are various locations you can upload the patch depending on what storage the ESXi host has access to. In my case, I am using a 2nd disk attached to my ESXi host called Datastore1

Click Datastore Browser, the Upload, and you will be prompted to upload your ESXi patch file. here is my Datastore Browser showing the patch file being uploaded

Enable SSH
SSH is typically disabled by default, so we need to enable this to facilitate the upgrade. From the ESXi Web UI, navigate to Manage → Services, the scroll down and locatel TSM-SSH. Note (as per screenshot) the SSH service is currently Stopped.

To start the service, select TSM-SSH, click Actions, then click start. TSM-SSH now shows "Running"

SSH to the host using Putty or similar, click Yes to connect

Login using root and the root password

Verify the ESXi host can see the file you just uploaded

Enable Maintenance Mode

Now lets browse the different image profiles inside the offline depot file. This is done using the command below. Note that the U3i image includes both security hotfixes and bugfixes, whereas the U3si image includes security hotfixes only. There are also images for a install (which includes tools) or a no-tools option.

Now lets apply the patch. I'm going to use the U3i image with tools, here's the full command you need to run
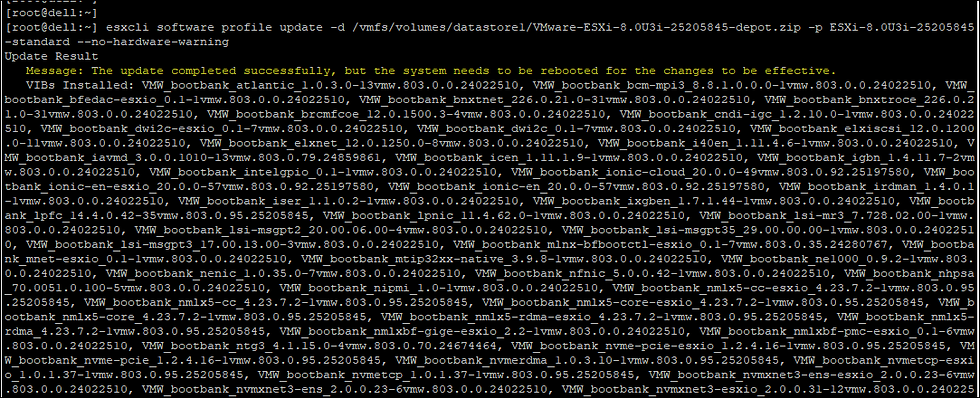
esxcli software profile update -d /vmfs/volumes/Datastore1/VMware-ESXi-8.0U3i-25205845-depot.zip -p ESXi-8.0U3i-25205845-standard
In my example output, i see a warning that my CPUs are not officially supported. Let's add the override and continue.

Adding the CPU override...

After about 30 seconds you should see the following output. Check the first line as highlighted. It should confirm the update completed successfully, and that the sytsem needs to be rebooted for the change to take effect
The output will also confirm which VMware Installation Bundles (VIBs) were Installed, Removed or Skipped during patching.
Now simply enter the reboot command to restart the ESXi host

Once the host has rebooted, reconnect via SSH, then check the version. Here you can see the build is showing as 25205845 which if you check against the Broadcom ESXi builds page, you can see corresponds to ESXi 8.0 Update3i

Finally don't forget to exit Maintenance Mode. Here i confirm it is still enabled,
disable it, then verify the change has taken effect

There you go guys, that's how you patch via CLI. Have fun!
Comments